Discrimination in Health and Social Care: Types and Preventions

36

May 06, 2025
 August 16, 2021
![]() 25 minutes
25 minutes

2480 Viewers
For certain types of authors, traditional
publishing can prove to be a great method.
As the writer, you get a handful of money as an advance to write your book. In traditional publishing, you might have the greatest chances of gaining media coverage.
However, unless you belong to one of the following groups, getting a deal can be uncertain:
And for everyone else below, self-publishing is a promising alternative. This includes:
The bottom line is if you’re a professional and want to become a published author, but you don’t have a massive audience, Amazon self-publishing is the best route.
Since Amazon Self-Publishing is the right choice for most writers, we’ll walk you through each step of the Amazon Self-Publishing process. Throughout, we will outline how Amazon Self- publishing works so that you can accomplish those steps on your own.
How to do the daunting task of Amazon self-publishing? Just follow these simple steps.
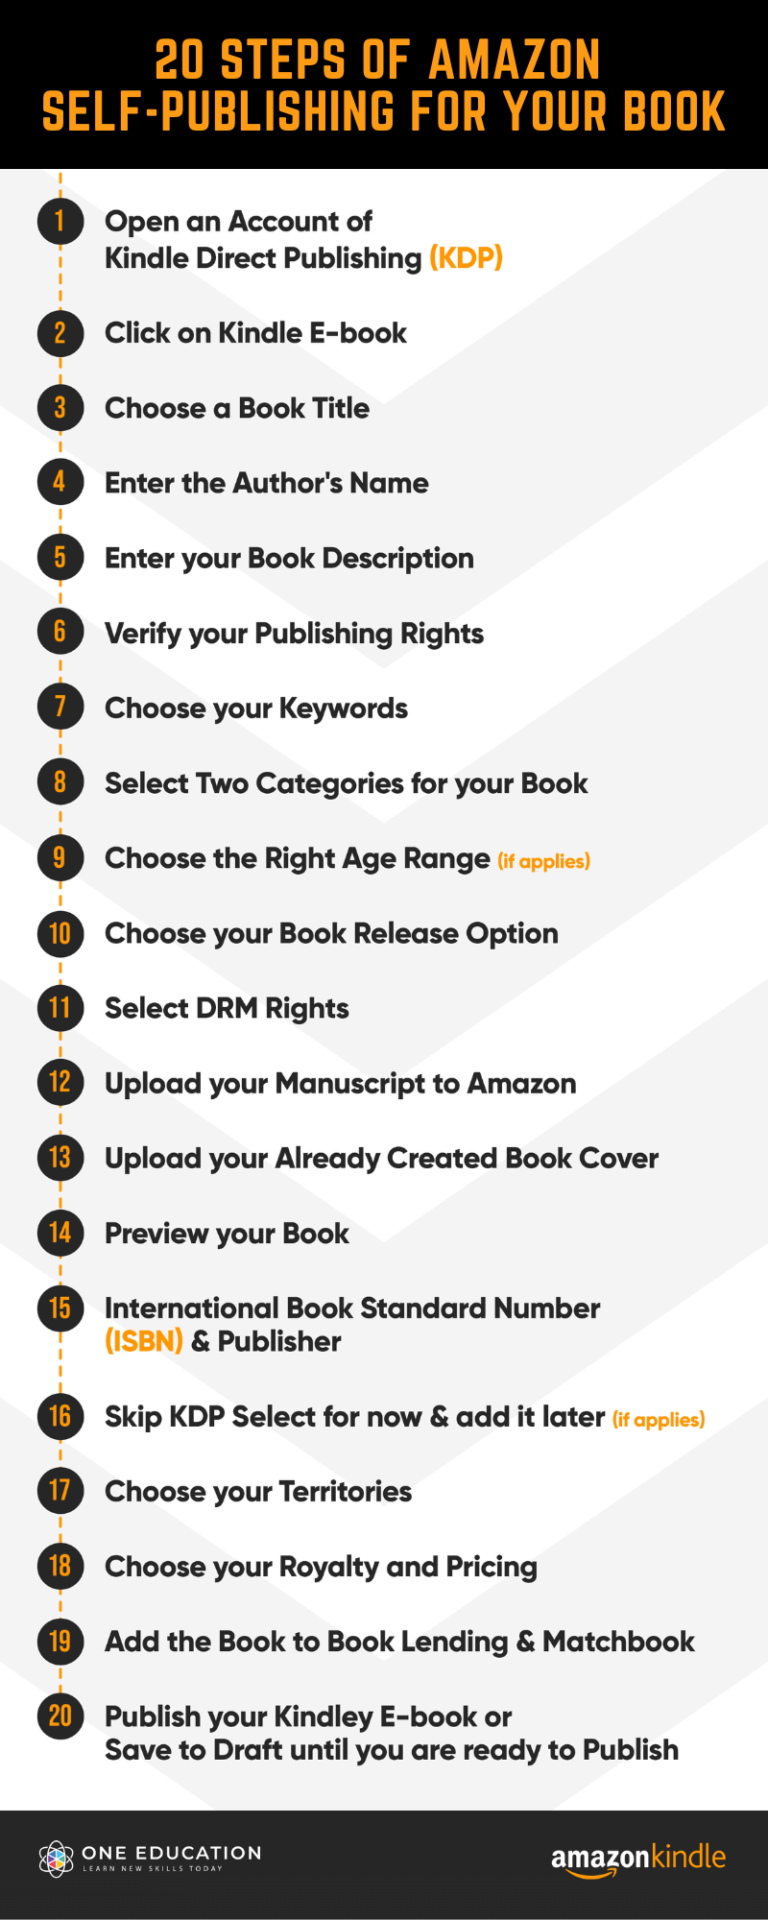 Well, doing each and every step in the right way may take some extra few hours. In fact, it might even take some extra days. But it surely will be worth it to end up with a book you’ll be proud of and a book that will sell. And till your book comes out, you won’t realize completely how satisfying Amazon Self-Publishing can be!
Amazon self-publishing starts with creating an Amazon KDP account and setting up that account with your information.
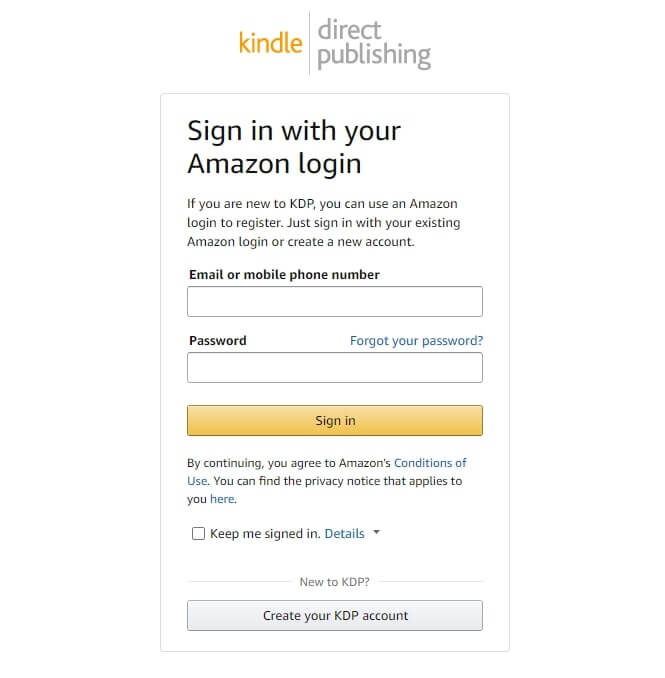
Here’s how to establish your KDP account:
1. Click to https://kdp.amazon.com and register with either your existing Amazon account or your email address.
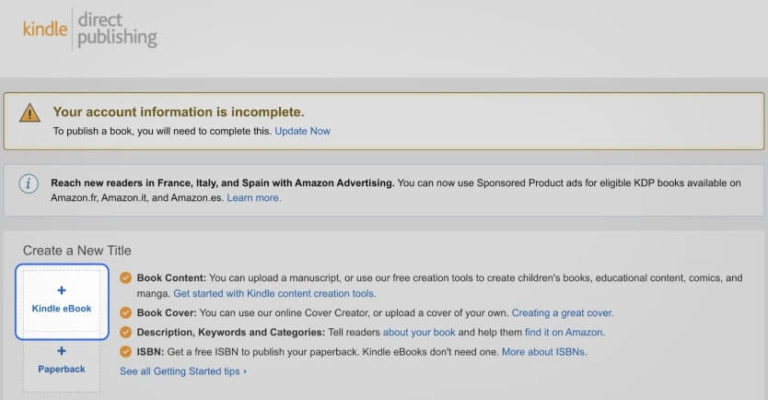
2. Next, click ‘Update’ in your account information and write down your tax info. It’s important not to skip this step and complete the tax information BEFORE publishing your book!
3. Once the tax information part is done, click ‘Finished,’ then go back to the Home page.
4. Well done! Your account setup is complete.
Since it is your first time signing in here with KDP, you will require to accept the terms of use. You can see your Amazon Author dashboard once you are done with that.
Now, because this is your first Amazon Self-Publishing, you will not have any titles listed additionally. To add a new Kindle e-book, click on the box that says ‘+ Kindle e-book.’
Once you started entering your information, choose the “Save as Draft” button at the footer of the page if you need to stop in the middle.
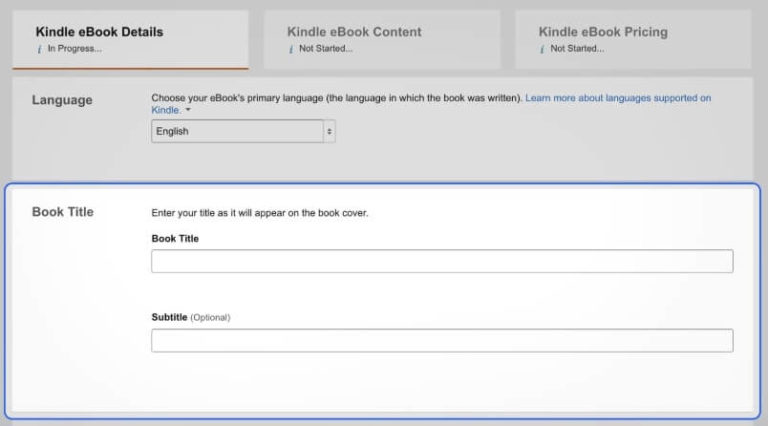
A title of a book is extremely important for any book. Readers start judging your book the instant by just reading the title. And, the title is the first thing that your readers will read from your book. Hence, you need to give your book a title and subtitle (optional).
Although the subtitle is optional here, you should definitely consider having a subtitle that will help you attract more views. Subtitle creates an effective design and helps readers to find your book when searching.
Your book must have a hook to speak to the reader. It must have a unique tone that grabs people’s attention and serves exactly what they are looking for. This will certainly depend on your personal writing style. But just in case it helps, here are a few common techniques that work great for making your book ‘un-put-down-able’:
– Writing a captivating title
– Adding elements of surprise
– Keeping some endings not too well-defined on purpose
– Minimizing the use of passive voice
– Connecting with the writer emotionally
– Defining and understanding the audience, and writing in a style that appeals to them
– Adding statements that are unconventional or unusual
The first and foremost thing your reader wants to know is what they will get by reading your book. This is where you can use the Subtitle option to attract readers further by providing compelling information.
Your title must be super clear so that the readers instantly get what they will gain by reading your book.
Catchy titles are engaging, and bland titles are not. Therefore, a catchy title remains in the human brain easily. So make an effort and be more creative and fun with your book title. An interesting and light-hearted title includes further characters in your book and is also a super technic to draw readers.
The bottom line is, keep the title simple, straightforward, and unique. Do some research on the title relevant to your book type and make sure it hasn’t been already used by a well-known book.
Because, of course, you don’t want to attract controversy for yourself, do you?
Think about a book title that you once were attracted to. Think about why that title was attractive to you, and use that method to create your own title. You can use the alliterations app to make your one easy to read and remember.
Remember, your book’s title and subtitle needs to be magnetic enough to compete.
Enter the name you want your book to publish under. You can use any Pen name if you wish to, but it should be the exact name you will use on your book cover.
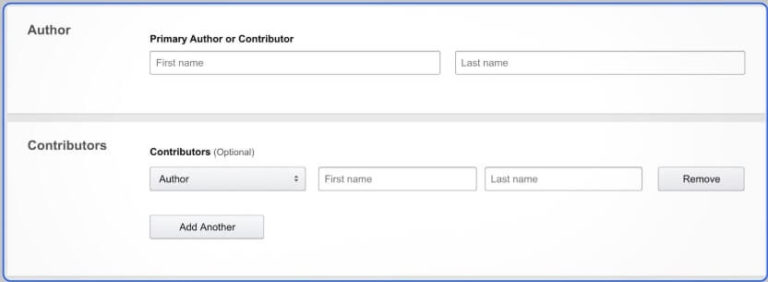
In case there is more than one writer, you can use the
Contributors box by clicking Add Another button.
Amazon will let you input up to 4,000 characters in your book description box. This write-up will arrive at your detail page of the book. A description is essentially a brief written narrative that represents what your book is all about. Treat your book description as a selling pitch to capture the attention of your readers.
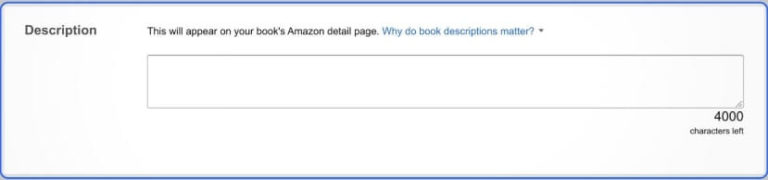
The description is important because, in many cases, it is the ultimate factor where readers decide whether they will read your book or not.
If you do it correctly, your well-written description can literally sell your book on its own.
It’s a key component of the marketing materials of your book. Even though your book cover and subtitle are supposed to do a great job of this, we all want some more detailed knowledge when putting our money into something.
So what people notice first when seeing a new book:
1. Title
2. Cover
3. Book Description
Here are some tactics to better craft your ideal description:
Spend some time to craft your interesting and eye-catching book description. Make your manuscript stand out to your readers and drive them to acquire your book. Write it nicely.
Amazon’s description box allows the old HTML tags if you use them for bold and italics. Utilize them wisely.
Choose the radio button that shows: “I own the copyright and I hold the necessary publishing rights,” unless you are not the writer.
Under UK copyright law, you own the right to your work when you first write it in any form.

Keywords are precise words or idioms that you use for describing your book. If someone is searching for a book on your subject, they will input one of those keywords into Amazon or Google and look for it to find it.
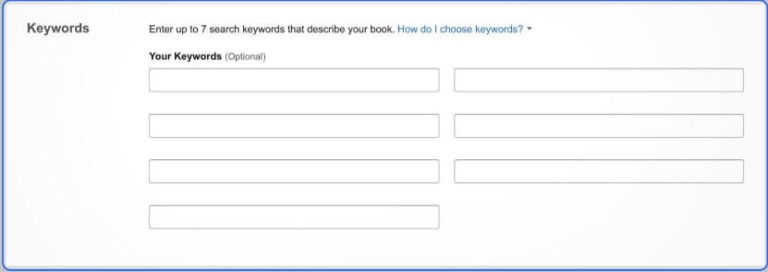
When you fill in these keyword boxes with some precise words or phrases, you are really saying: “When people enter ‘these words’ in an Amazon or Google search, I want my book to show up.”
For instance, if your book is on the subject of spirituality, you may find keyword like these useful:
And so on.
So in order to make your book display in Amazon and Google search engines, you will require the proper mix of keywords.
Considering Amazon allows you to input only seven keywords per book, you will need a strategy to select your keywords. In that case, use tools like-
3. Amazon’s Autofill Function
First, make a listing of potential keywords for your book, then use the tools above to check your keyword’s density. The right keywords will have your book rank higher and appear more often to readers.
Reread your book introduction to get relevant keywords.

Use the “+” buttons to choose two categories for your book and drill down as far as you can.
Here comes another significant marketing decision. Here you plot where readers will see your book.
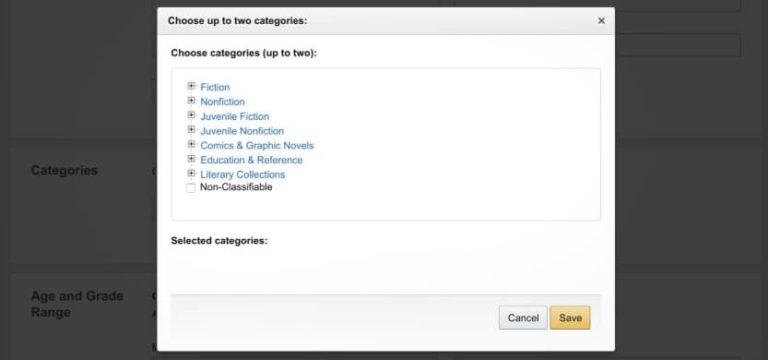
Amazon provides you with a collection of categories and subcategories to choose from. Like keyword selection, your goal is to look for trending areas with tons of competition.
These sections are what you will rank as a bestseller in. That is why it is important to make sure you select the right and fitting categories. The categories need to be specific and not super competitive. In fact, all you want to stand out, right!
Amazon does ranking measures to find out how well a product is being purchased compared to its opponents. Books that are ranked 2,000 and less are considered to be highly purchased books in that particular category.
Here are some tips on how to rank in more than one category:
Unless you have an established audience with notable downloads and reviews, it’s wise to aim for categories that rank between 10,000-30,000.
You can check the rankings of the top three books on the first page of each category.
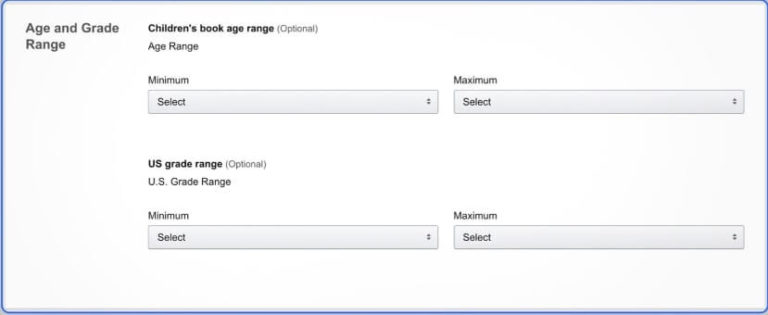
Don’t do anything with this box unless your book is for younger readers or teens. If that’s the case, then select each minimum and maximum that applies to your book.
Unless you already have a long line of buyers lined up to buy your book, you will need a marketing strategy prior to publishing, especially if it’s a non-fiction book.
Book sales are encouraged by advance reviews, media coverage, email lists, book blurbs, and more. These kinds of buzzing are a lot more manageable to generate for a new book, as well as potent.
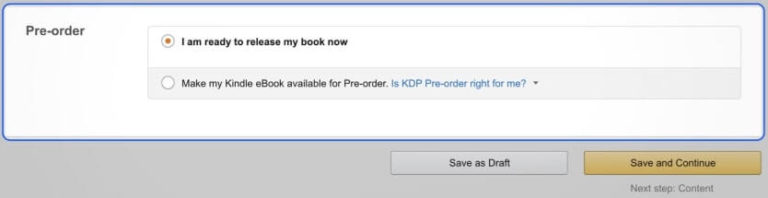
No matter what date you choose to publish your book, for now, you can keep going by choosing “Save and Continue.” But remember to come back and set your actual date of publishing your book.
Amazon used to have a limitation on KDP pre-order dates, but currently, they can be up to twelve months in advance. Use this information wisely.
Make sure that you click on the ‘Yes’ button and enable Digital Rights Management. What it will do is, it will stop people copying your book and forwarding it for free to others.
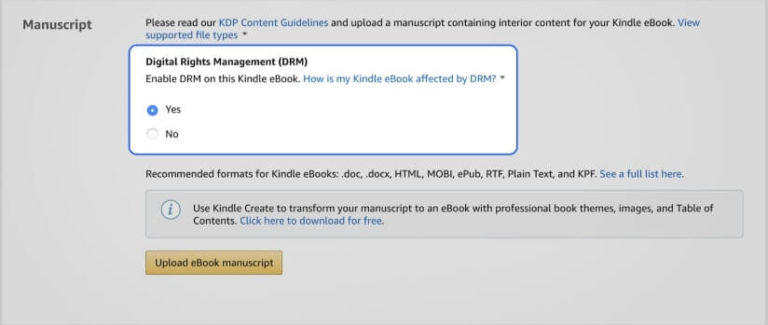
With DRM turned on, people can lend the book to others for a limited time through Kindle’s lending system. However, they can’t keep it.
However, changing the DRM setting won’t be possible once you’ve published your book.
Despite the availability of doc files and PDF options, convert your e-book into a well-formatted epub file and then upload it. Always use the current format of Kindle in order to make your book look good in e-readers.
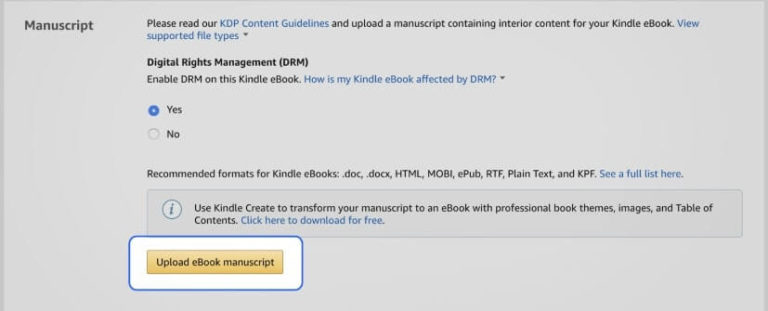
Formatting a book is not easy. However, doing a good job is important unless you want your book to look unprofessional. For Amazon, e-books need to be formatted a bit differently than any other e-book retailer.
You can preview your book after you load the cover file.
Here are the ways to upload your book on Amazon:
1. In your Kindle Direct Publishing (KDP) account, go to “Your Bookshelf”.
2. Locate and click on “Kindle e-book Actions” next to the title of your book.
3. Locate and click on “Edit e-book Content”.
4. Click on “Upload e-book manuscript”.
5. Upload your manuscript file on your computer.
6. Upload complete!
Once Amazon is done uploading your file, you will get a confirmation message. Preview the uploaded file to check and make sure there are no errors.
Make use of the feature “Look Inside” to check how your book looks once the book is live on Amazon.
Wrong or off formatting can prevent readers from picking up your book. So, take an extra step here and make sure your formatting looks good here too. Or you can hire a professional e-book formatting person to ensure it looks good.
Also, the “Look Inside” feature is usually the first thing your proposed readers will click on while checking your book out.
When publishing a book on Amazon KDP, having a perfectly designed book cover is one of the major aspects to think about. Opposite to what we knew while growing up, people do, in fact, judge a book by its cover. It’s actually one of the most significant restraints.
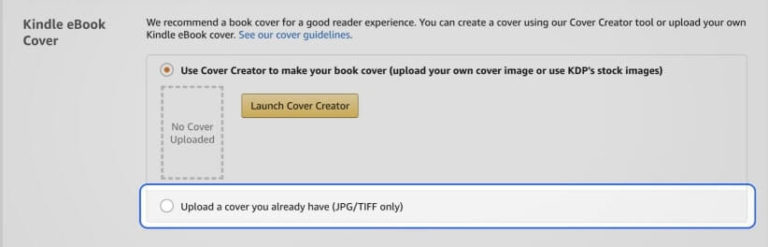
Seeing your book cover is exactly how people will judge your book at first glance. You like it or not, this is true. And there is a ton of marketing research to back it up. If you want your book to sell out, the cover design has to be magnetic and professional for sure. Make sure that professionals create your book cover, and it stands apart from the rest in your genre or category.
Resist the temptation of designing your own book cover unless you know what you’re doing. Even something as simple as the font can spoil your whole cover. So take this Self-publishing On Amazon with Canva Book Covers – For Beginners course to make your book cover stand out.
If you want to be considered seriously as an Author, don’t hesitate to hire a professional designer and listen to them.
You can find such cover designers on freelancing platforms. Prices will depend on the level of design, but freelancing platforms can give you loads of amazing graphic designers to choose from! Don’t worry! It’s a potent investment to make your book stand out perfectly.
Once you are done uploading your document and cover, use ‘Kindle Previewer’ to preview your book.
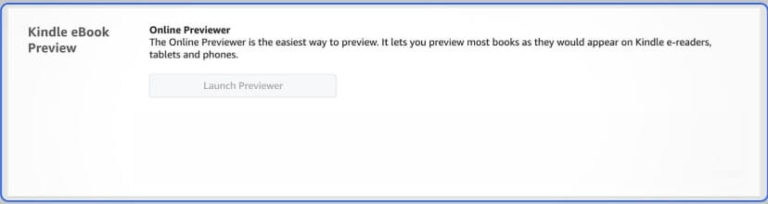
Do not use the “Launch Previewer” button unless you want to launch the book. Instead, go to “Preview on your computer” and install the previewer app according to your system (Mac or Windows). Then download your file and open it through the “MOBI” link. Study and test everything twice. It’s better not to rush through your preview process.
Check your cover image and make sure the navigation works properly. Check every external link and look at every page one by one.
Reading our own book over and over isn’t fun; we get it! But that’s the price of self-publishing.
You don’t need an ISBN (International Standard Book Number) or a publisher for Amazon self-publishing. Unless you don’t aim to publish your book outside of Amazon KDP, leave these sections blank.
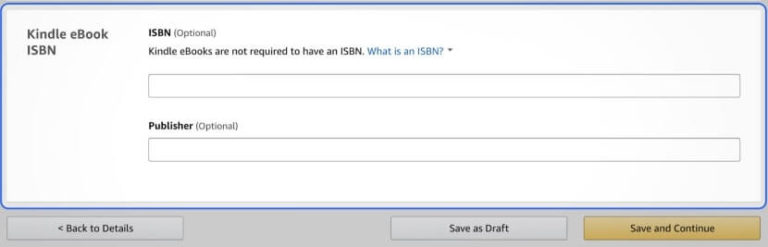
From here, click on the “Save and Continue” button if you want to continue. Your book won’t be published until you click on the “Publish Your Kindle e-book” button on the next screen.

The ‘KDP Select Enrollment’ enrols your book in Kindle Unlimited. It also gives you some additional marketing options like Kindle countdown deals. However, your book has to be Amazon exclusive.
Include this decision in your overall book marketing plan.
Read about book marketing on Book Marketing 101: Tips & A Peek into Book Marketing Services to discover essential strategies and services for promoting your book effectively.

You can add your book to KDP Select later, even after the publication. But remember, once it is in the program, you have to wait and leave it there until it’s three months.
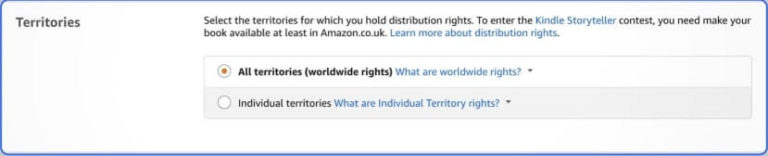
Don’t be hesitant to choose the “All territories (worldwide rights)” option unless you have a valid reason not to.
This step will make your book available globally.
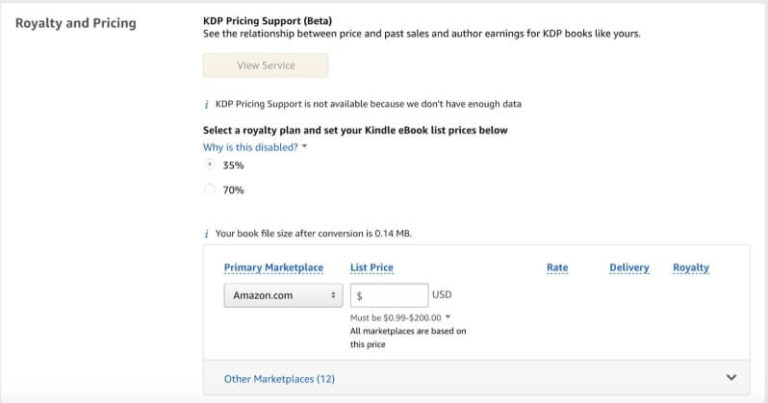
You may be wondering, how much should you be pricing your new book after the initial launch is done?
Although this is entirely up to the author, the best range to price your book is from $2.99 to $9.99. The royalty payment’s variation depends on the country you live in. However, you can learn more on the KDP Select pricing page.
One successful tactic for a new author is to price their book at $2.99 first and gradually raise it by $1 a week. Yes, with this method, at some point, your sales will begin to dip. And while that’s a contradictory statistic, in that case, this method will help you find out the perfect price for your book that assures a profit.
Experiment with different strategies that your competitors used to pinpoint the price for your book. It will bring long-term success for you.
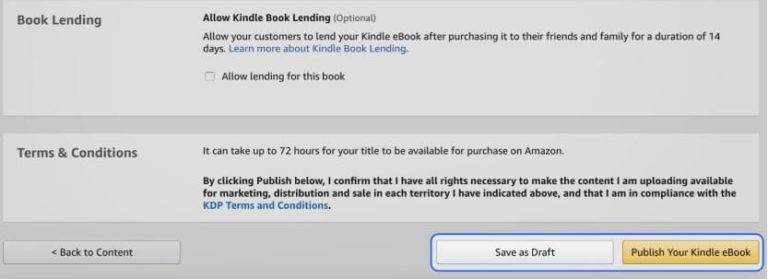
These options are completely up to you. However, you will have to enrol in book lending if you want the 70% royalty.

Choose the “Save as Draft” option until you’re fully ready to pick a publishing date to launch your book.
Well, we can’t emphasize enough how crucial it is to think through every phase of your book’s marketing before publishing. That goes beyond just your book’s layout, its cover, pricing, and marketing plan.
It further includes the author’s branding.
The minute your book goes live, you will need to set up your Amazon Author profile by adding your author photo and bio. You will also have to add blurbs to your book’s detail page.
Get those done.
Finally, pay close attention to your gut feelings, AKA instinct. No matter how restless and excited you’re feeling to see your book finally on the Kindle store. Your gut will point out to you if something isn’t ready yet. If your gut feeling is telling you to wait and fix anything, do it; don’t push it away!
Amazon is the world’s #1 book or E-book retailer. Anyone can publish on Amazon, absolutely free of cost.

Now that you have been through all the publishing process and your book is finally published, it’s time to face competition in the market.
So why we are saying that? It’s because anyone can do Amazon Self-Publishing, but that doesn’t mean your book will sell. In order to compete with the thousands and millions of books on Amazon, you must do everything you can to make your book commercial and competitive.
After you publish your book on Amazon, you can grab attraction, and therefore buyers by advertising your book to people on Amazon in your genre. The cost of advertisements starts at about $3 per day and up, depends on your funds. Rest assured, Amazon advertisement is a solid way to boost your new book.
You can join KDP Select to run price promotions on Amazon as well. Once you are done setting up a price promotion, Amazon will spread the word to the readers in your genre. However, this facility is only applicable for books that are exclusive to Amazon. Or you can first start with this option before leaving KDP Select, unlike other authors. By doing this, you can publish with other retailers.
There are several pros and cons of Amazon Kindle self-publishing that are essential to understand before making a decision.
First, let’s get into the pros of self-publishing on Amazon specifically.
With Amazon Self-Publishing, there are no doorkeepers.
Anyone who desires can self-publish their books. Whereas, with a traditional publishing firm, the publisher must be convinced and confident about your book.
And guess what, as a result, hardly 1% of the book proposal get published by traditional publishers.
In Amazon Self-Publishing, you as the author own 100% of the rights and royalties. You also have total control over the creativity and ownership of your intellectual assets.
Whereas in the traditional publishing process, you have to hand over all these powers to the publishing business. And that means you, as the author, will hold only a small portion of book sales. For instance, only 7.5% of total royalties on every sold paperback and only 25% on every e-book.
Amazon itself is a vast platform. It’s trusted and reputable, and you will sell your book alongside those of well-known authors. This means you won’t be needing to sell your books out of the back of your boot. Instead, friends, family, and potential readers can easily purchase them online; without you having to deal with them.
On the other hand, most traditional publisher and the author don’t know how to market their books.
Amazon offers a print-on-demand service, which means you don’t need to stock up a pile and then try to sell it. This also means that you can send a hard copy of your book to any places Amazon operates, without you as the author having to get it first physically.
As a self-published author, you have quite a bit of control over who sells your books nowadays. You can choose to publish with every significant platform or with Amazon exclusively.
You might be wondering why anyone wouldn’t decide to publish on every platform possible, but Amazon gives you quite a few advantages. For example, your book will automatically enrol in the Kindle Owner’s Lending Library (KOLL) and the Kindle Unlimited (KU) program. This way, existing subscribers to Amazon’s subscription services can read your book as part of it. You will then receive interests based on people acquiring the book, which is, of course, less than if someone purchases it.
With Kindle Unlimited, you’re paid by the number of pages the individual has read.
With KDP Select, you can also have access to exclusive marketing features. These features will allow you to make your book accessible for a while. This is a potent way to increase your sales. Many authors noticed a significant improvement after offering their books free of cost. The main reason behind it is basically the book becomes more apparent if it becomes a “best-selling” free book for that period of time. It also provides you with a huge possibility to collect honest reviews and, therefore, build a community.
Amazon allies with Audible to help you give a new dimension to your books. While this is an entirely different topic in itself, you’ve got the freedom to tie in an Audible audiobook with your Amazon listing as an Amazon publisher.
Of course, audiobooks are not exclusively for Amazon, yet, consumers will be able to get it in a “one-stop-shop” on Amazon.
Now that we are done talking about all the major perks of Amazon Self-Publishing, let’s talk about the aspects that are relatively limiting.
If you enrol in KDP Select, your books’ growth will only reach so far, depending on your genre. Readers won’t be able to get your book from somewhere else if they are not comfortable with Amazon or online products. If people don’t trust Amazon or avoid it for some reason, you will lose your business along with Amazon despite offering a good deal.
However, going with KDP Select is a financially wise decision for some genres because of its marketing.
You should also note that Kindle Select payouts via Amazon are getting smaller and smaller as competition grows. Because of this fact, many authors are willing to leave KDP Select and searching for better ways to ensure that their remittances keep coming in and at the same rate.
Now, this con is only for those who expect to publish their books everywhere besides Amazon. Do you know that when you launch any digital objects on Amazon, you will get a 90-days exclusivity period? It means that in this period, you cannot sell your copy elsewhere. And, this can put a notch in a launch, right?
As an Amazon publisher, you are restricted to post less than 10% of your content anywhere online. Even if it is in your private blog or part of an Instagram story, it needs to be removed instantly. Or else you’ll be considered as violating your agreement.
The bottom line is, publishing is a skill entirely separate from writing, and Amazon Self-Publishing has taken publication opportunities to the next level.
Now, authors can self-publish their books with the click of a button. And Amazon self-publishing has made the process more convenient than ever.
That is why it can be tempting to present your manuscript to the world, making you rush the process. But if you rush, it might cause you to throw away all the dense work and passion you put into writing it.
Because publishing an unprofessional book makes you look unprofessional. So, that won’t benefit you in the long run. Here’s a course on Self-publishing On Amazon with Canva Book Covers – For Beginners to help out with your self-publishing efforts on Amazon.
Yet, if you take enough time and do it right, Amazon self-publishing will be the most fulfilling accomplishment on your list—for yourself and your career!

36
May 06, 2025

96
April 28, 2025

125
April 24, 2025

125
April 17, 2025


Upgrade to get UNLIMITED ACCESS to ALL COURSES for only £49/year
Claim Offer & UpgradeMembership renews after 12 months. You can cancel anytime from your account.